Today I’m going to publish my brand new Android application called “Sinhala Unicode” .
This application will help you to type whatever you want in Sinhala just like you are typing an SMS.
It is very easy and simple to use.All you have to do is type in your text with English keyboard, meantime app transliterates this text in to Sinhala for you Offline. After you type your post, status, email in Sinhala you could share it with your friends within app it self.
As well as you can type both Sinhala and English words like below.
Other than that there are more features…….
* Easy typing like sinhala sms
* Share on Facebook & Facebook Messenger
* Post to Twitter
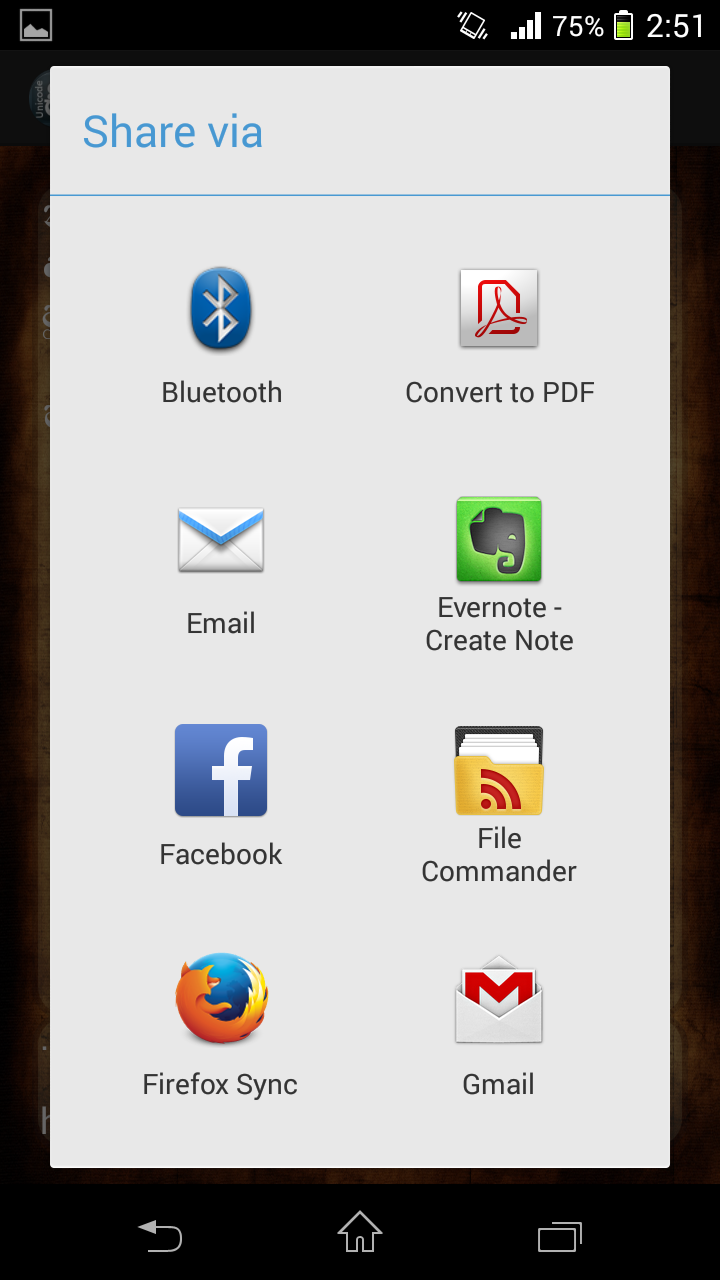
* Send via Email, Bluetooth etc…
* Message a friend if device supports
* Supports both android phones and tabs.
* Supports both landscape and portrait moods.
You can download this application from Google Play Store for free . If you think this is useful for you do not forget to rate it and make comments.
Today I am going to tell you how to work with Google Maps Android v2 . In here I will show you how to view your current location in Google Maps with GPS.
First of all you have to Add Google Play Service Library to your project because Google Map for Android is now integrated with Google Play Services. So we need to set up Google Play Service Library for developing Google Map application in Android.
Please follow the given below link to setup Google Play Service library in Eclipse.
This is how you add Google Play Service Library to your project
Next We need to get an API key from Google to use Google Maps in Android application. Please follow the given below link to get the API key for Google Maps Android API v2.
then you are done with main steps. Now lets move to the coding part.
This is my Activity file >>>>>>>>>>>>>>
package com.madushanka.mylocation;

import android.annotation.SuppressLint;
import android.app.ActionBar;
import android.location.Criteria;
import android.location.Location;
import android.location.LocationListener;
import android.location.LocationManager;
import android.os.Bundle;
import android.support.v4.app.FragmentActivity;
import android.view.Window;

import com.google.android.gms.maps.CameraUpdateFactory;
import com.google.android.gms.maps.GoogleMap;
import com.google.android.gms.maps.SupportMapFragment;
import com.google.android.gms.maps.model.LatLng;
import com.madushanka.mylocation.R;

@SuppressLint("NewApi")
public class LocationActivity extends FragmentActivity implements LocationListener{
    private GoogleMap mMap;

    @Override
    public void onCreate(Bundle savedInstanceState) {
        super.onCreate(savedInstanceState);

        if (android.os.Build.VERSION.SDK_INT < 11)
		 {
			 requestWindowFeature(Window.FEATURE_NO_TITLE);

		 }
		else{
		ActionBar actionBar = getActionBar();
		actionBar.hide();}

        setContentView(R.layout.activity_location);

        loadMap();

        LocationManager locationManager = (LocationManager) getSystemService(LOCATION_SERVICE);

        // Creating a criteria object to retrieve provider
        Criteria criteria = new Criteria();

        // Getting the name of the best provider
        String provider = locationManager.getBestProvider(criteria, true);

        // Getting Current Location
        Location location = locationManager.getLastKnownLocation(provider);

        if(location!=null){
            onLocationChanged(location);
        }
        locationManager.requestLocationUpdates(provider, 20000, 0, this);
    }

    @Override
    protected void onResume() {
        super.onResume();
        loadMap();
    }
// this is method for create and load map with Support Map Fragment

    private void loadMap() {
        if (mMap != null) {
            return;
        }
        mMap = ((SupportMapFragment) getSupportFragmentManager().findFragmentById(R.id.map)).getMap();
        if (mMap == null) {
            return;
        }
        mMap.setMapType(GoogleMap.MAP_TYPE_HYBRID);
        mMap.setMyLocationEnabled(true);

    }

	@Override
	public void onLocationChanged(Location location) {
		 double latitude = location.getLatitude();

	        // Getting longitude of the current location
	        double longitude = location.getLongitude();

	        // Creating a LatLng object for the current location
	        LatLng latLng = new LatLng(latitude, longitude);

	        mMap.moveCamera(CameraUpdateFactory.newLatLng(latLng));

	        // Zoom in, animating the camera.
	        mMap.animateCamera(CameraUpdateFactory.zoomTo(14), 2000, null);

	}

	@Override
	public void onProviderDisabled(String provider) {
		// TODO Auto-generated method stub

	}

	@Override
	public void onProviderEnabled(String provider) {
		// TODO Auto-generated method stub

	}

	@Override
	public void onStatusChanged(String provider, int status, Bundle extras) {
		// TODO Auto-generated method stub

	}
}
This is my Layout xml >>>>>>>>>>>>>>>>>>
<?xml version="1.0" encoding="utf-8"?>
<!--
See this page for more XML attribute options
https://developers.google.com/maps/documentation/android/map#using_xml_attributes
-->

<fragment xmlns:android="http://schemas.android.com/apk/res/android"
          xmlns:map="http://schemas.android.com/apk/res-auto"
          android:id="@+id/map"
          android:layout_width="match_parent"
          android:layout_height="match_parent"
          android:name="com.google.android.gms.maps.SupportMapFragment"
          map:mapType="normal"/>
Next we have to add permissions , app key and openGl feature to app manifest.
This is my Android Manifest File >>>>>>>>>>>>>>>
My Location this is my new Android application . Where you can find your own location real-time with GPS . You can view your location in the map with satellite view.
This is my MainActivity class which is related to above layout.
package com.madushanka.dbtest;

import android.os.Bundle;
import android.app.Activity;
import android.content.Intent;
import android.database.sqlite.SQLiteDatabase;
import android.util.Log;
import android.view.View;
import android.widget.EditText;
import android.widget.Toast;

public class MainActivity extends Activity {

	SQLiteDatabase myDB = null;
	String TableName = "Student";
	String Data = "";
	EditText studentName;
	EditText studentAge;

	@Override
	protected void onCreate(Bundle savedInstanceState) {

		super.onCreate(savedInstanceState);

		setContentView(R.layout.activity_main);

		studentName = (EditText) findViewById(R.id.editText1); // getting text fields (Edit Text)

		studentAge= (EditText) findViewById(R.id.editText2);

	}

	// this method will trigger when user clicked " CreateDB & Table " button

	public void createDB(View v) {

		try {
			// Get the database if database is not exists create new database
			// Database name is " test "

			myDB = this.openOrCreateDatabase("test", MODE_PRIVATE, null);

			// Create table with tow columns (Name and Age)

			myDB.execSQL("CREATE TABLE IF NOT EXISTS " + TableName
					+ " (Name VARCHAR, Age INT(3));");

			Toast.makeText(getBaseContext(), "Database & Table Created",Toast.LENGTH_LONG).show();

		} catch (Exception e) {

			Log.e("Error", "Error", e);

			Toast.makeText(getBaseContext(),
					"Error in creating atabase or Table", Toast.LENGTH_LONG).show();

		}

	}

	// this method will trigger when user clicked " Drop DB " button

	public void drop(View v) {

		try {
			// we use deleteDatabse("Database name ") method to delete database
			// we have to pass String parameter to give the name of database

			deleteDatabase("test");

			Toast.makeText(getBaseContext(), "Databse Deleted", Toast.LENGTH_LONG)
					.show();
		} catch (Exception e) {

			Log.e("Error", "Error", e);

			Toast.makeText(getBaseContext(), "Error in deleting",Toast.LENGTH_LONG).show();

		}

	}

	// this method will trigger when user clicked " Save Data " button


	public void addData(View v) {

		try{

			// getting created database or if database is not exists create new database

		myDB = this.openOrCreateDatabase("test", MODE_PRIVATE, null);


		String name =studentName.getText().toString();
		int age = Integer.parseInt(studentAge.getText().toString().trim());

		myDB.execSQL("INSERT INTO " + TableName + " (Name, Age)" + " VALUES ('"
				+ name + "', " + age + ");");

		Toast.makeText(getBaseContext(), "Date Saved ", Toast.LENGTH_LONG).show();
		}

		catch(Exception e){

			Log.e("Error", "Error", e);

			Toast.makeText(getBaseContext(), "No Database found   ", Toast.LENGTH_LONG).show();

		}
	}

	// this method will trigger when user clicked " View Data " button

	public void viewData(View v) {

		// creating new intent using ViewActivity Class and start activity to show table data

		Intent i = new Intent(this,ViewActivity.class);
		startActivity(i);

	}

}
Second Layout is activity_view.xml using this layout I will dispaly the table content (table recodes)
This is my View Activity Class which is related to above layout
package com.madushanka.dbtest;

import android.os.Bundle;
import android.app.Activity;
import android.database.Cursor;
import android.database.sqlite.SQLiteDatabase;
import android.graphics.Color;
import android.util.Log;
import android.widget.TextView;
import android.widget.Toast;

public class ViewActivity extends Activity {

	SQLiteDatabase myDB = null;
	String TableName = "Student";
	String Data = "";


	@Override
	protected void onCreate(Bundle savedInstanceState) {
		super.onCreate(savedInstanceState);
		setContentView(R.layout.activity_view);

		try {

			myDB = this.openOrCreateDatabase("test", MODE_PRIVATE, null);

			//getting the cursor object

			Cursor c = myDB.rawQuery("SELECT * FROM " + TableName, null);

			int Column1 = c.getColumnIndex("Name");
			int Column2 = c.getColumnIndex("Age");

			c.moveToFirst();

			if (c != null) {

				do {
					String Name = c.getString(Column1);

					int Age = c.getInt(Column2);

					Data = Data + Name + "\t\t" + Age + "\n\n";

				} while (c.moveToNext());
			}

			TextView tv = new TextView(this); // creating Text View to show data in the app
			tv.setTextColor(Color.WHITE);
			tv.setBackgroundResource(R.drawable.b);
			tv.setTextSize(18F);
			tv.setText("\n"+"Name \t| Age \n ----------------------\n"+Data);
			setContentView(tv);  // set created text view as Content View

		}

		catch (Exception e) {

			Log.e("Error", "Error", e);

			Toast.makeText(getBaseContext(), "No Data found   ", Toast.LENGTH_LONG).show();

		} finally {
			if (myDB != null)
				myDB.close();
		}
	}


}
Now days I’m having my new year vacation. So i decide to developed android app for you.
This time I focused on developing a utility app for android users.
When we talking about ” Maduzz Call Blocker ” app first thing is its a light weight app and it will take low amount of your RAM .
If you want to block unwanted callers or Messages this is a best way to do it. All you have to do is add number to app’s Block List.
From that point app will deal with your unwanted callers and It will block all the calls from them.
As well as SMS messages.
When you want unblock the callers you can go to block list and select unblock thats all.
Best thing is this app is very easy to use and Its very fast.
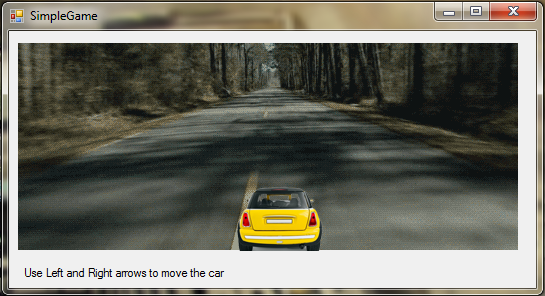
Now days I’m learning C# there for I decide to tell you how to make simple game using C#.
In above picture you can see car and the background (road) if you watch the video example you can see the road is moving in order to move the road I used gif animation picture and as a car I used png image.
In here I’m using ProcessCmdKey() method to track the user input and change location of the car .
here is the code example >>>>
using System;
using System.Collections.Generic;
using System.ComponentModel;
using System.Data;
using System.Drawing;
using System.Linq;
using System.Text;
using System.Windows.Forms;

namespace SimpleGame
{
    public partial class Form1 : Form
    {

        public Form1()
        {
            InitializeComponent();
        }

        private void Form1_Load(object sender, EventArgs e)
        {
            // i want to hide the border of the car therefor i change the
            // background of the car to tarnsperent
            // and locate the car top of the background image (Road)

            pictureBox1.BackColor = Color.Transparent;
            pictureBox1.Parent = pictureBox2;
       }

        protected override bool ProcessCmdKey(ref Message msg, Keys keyData)
        {

            if (keyData == Keys.Left) // Left arrow
            {
                // getting the current location of car and change the X parameter .
                // then set new location to picturebox

                Point cpoint = pictureBox1.Location;
                Point nw = new Point(cpoint.X-10, cpoint.Y);
                pictureBox1.Location = nw;

                return true;

            }
            else if (keyData == Keys.Right) // Right arrow
            {
                Point cpoint = pictureBox1.Location;
                Point nw = new Point(cpoint.X + 10, cpoint.Y);
                pictureBox1.Location = nw;

                return true;
            }

            else return base.ProcessCmdKey(ref msg, keyData);
        }
    }
}
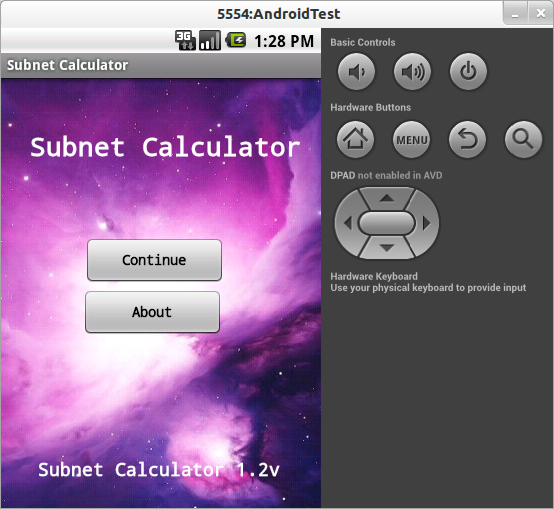
After my first android app “Waterbill Calculator” I decide to developed a app which is useful for people who work in IT field and students who are studying IT .
Computer Networking is most complex and wide area in IT field. IP Subnetting is one of the most famous part in the networking.So i have decide to develop app which support for Subnetting task in networking.Sometime its seems bit complex but using this app you can obtain IP subnet Addresses very easily.
What you have to do is provide IP address , Subnetmask it means in here app required number of ‘1’s in subnetmask
ex- lets consider Subnetmask is 225.255.225.224 – 11111111.11111111.11111111.11100000 (binary format)
No of ‘1’s in subnetmask is = 27
Next you have to provide Number of subnets that you want create then press next button to see the results.
Within 1 second app will provide all the subnets and IP addresses according each subnet with complete details like below.
click top of the each subnets to view the IP address with details.
You can download this App here >>>>> Download Subnet Calculator
If this app useful to you do not forget to make comment.
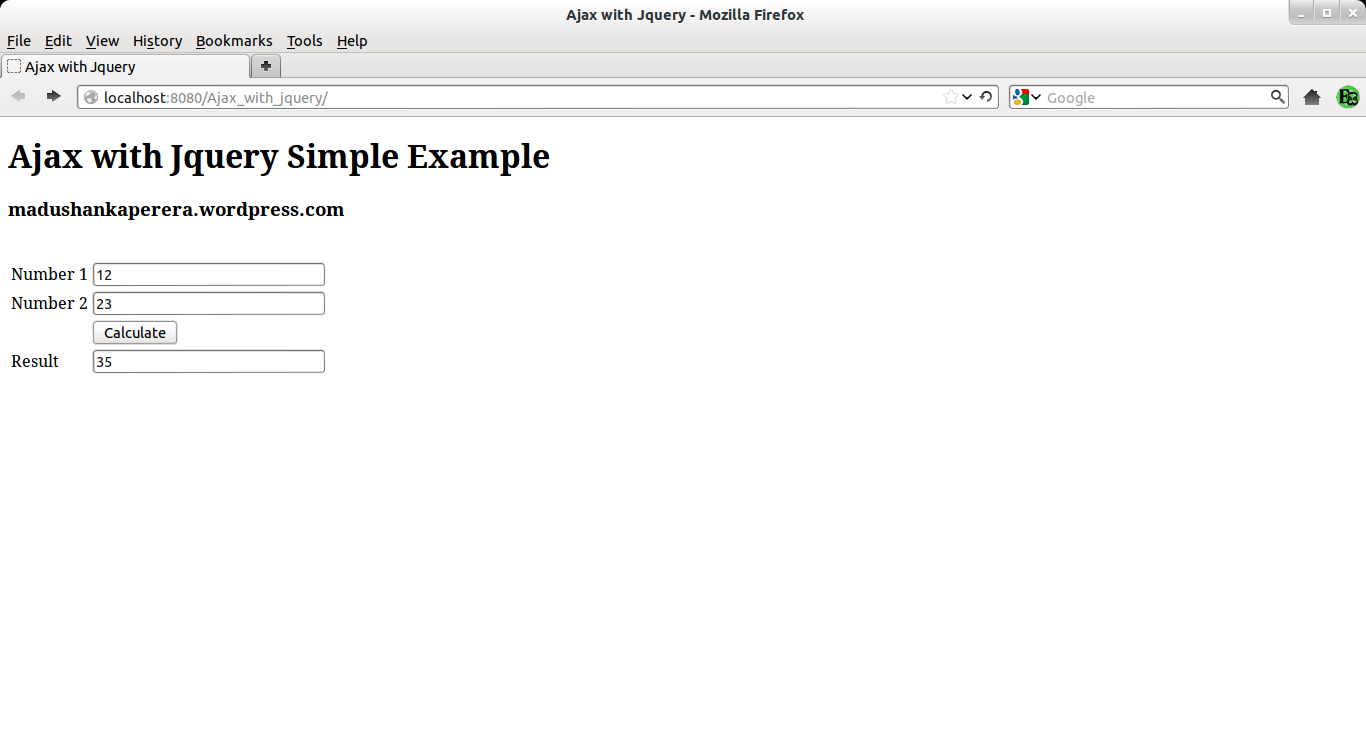
Now days I’m working on a web project. So I decide to tell you some modern web techniques regarding Web Developing.
Now a days one of the most popular plugin is a Jquery plugin so in here I’m explaining how to use Jquery with Ajax.
If we want to get some data from the user in webpage the best way is to use html <form> tag but case is if we using normal Ajax we have to write long java script to handle that ajax object but if we use Jquery we have to write only few lines of code to do it .Other thing is we can send whole form using one line of code.
Lets see how to do it. This is my JSP file name is Index.jsp it has simle form and when user click calculate button result will show in result textbox without refresing a page.
I have use Jquery Ajax method to deal with the Ajax.First I’m getting the form element in html tag to javascript variable
called “form” then I’m passing it to my servlet using Ajax. Then getting return value from servlet and dispaly it on page
In this example getting the 2 values from the user and pass it to java servlet and calculate the sum and display it on a page
here is my Java Servlet name is “Ajaxexample.java”
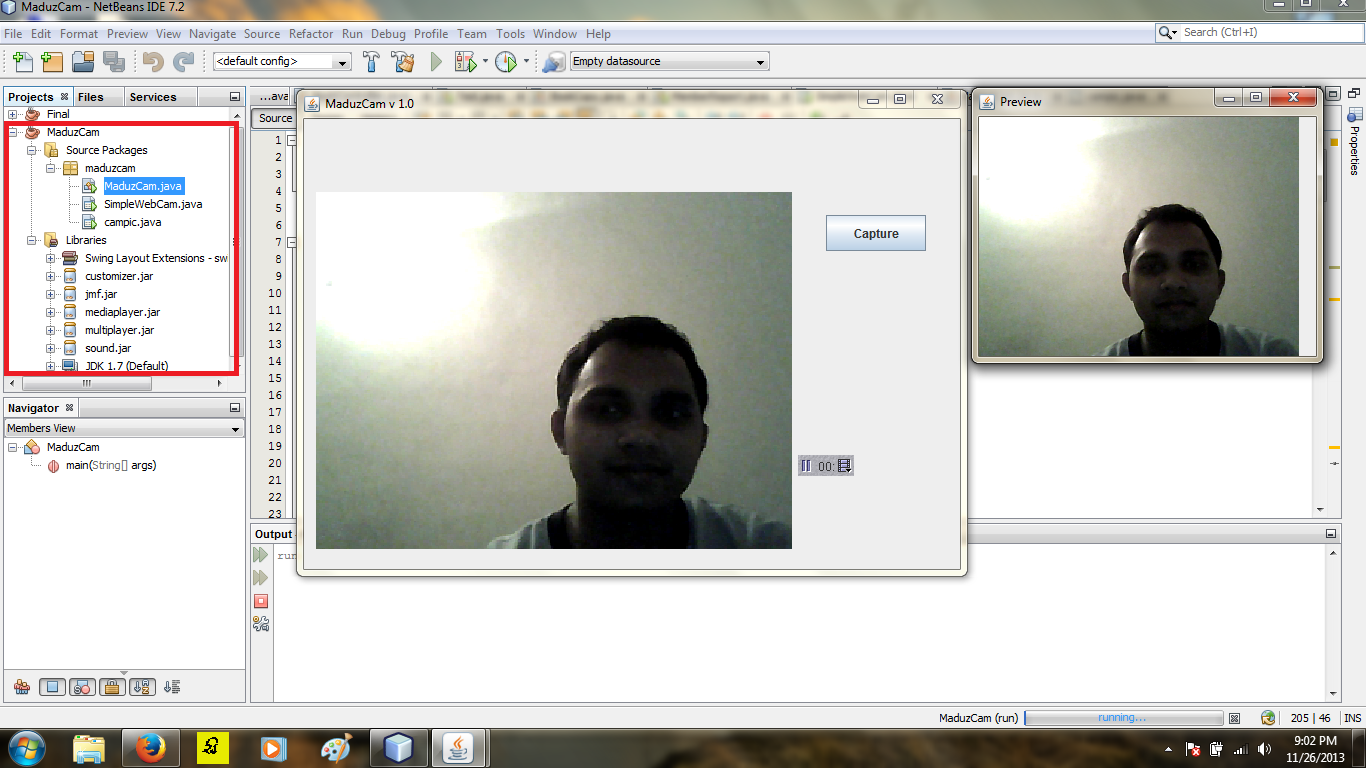
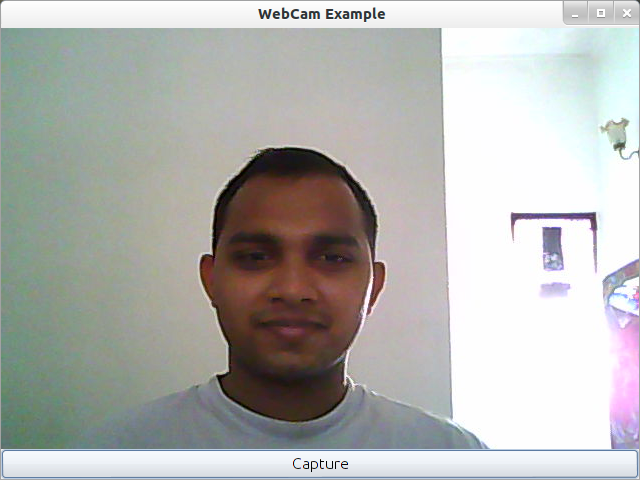
Today i am going to tell you how to developed simple Webcam application for linux using java. If you are using windows you can easily develop using Java Media Framework (JMF). But JMF is not support for Linux there for we have to use external library call Video4Linux4Java (v4l4j).
First of all you have to install v4l4j or else you have to import v4vl4j.jar file to your project .You can get all the instructions to set up v4l4j from the video for linux website.
This is a sample code for accessing webcam , capture image and save it .
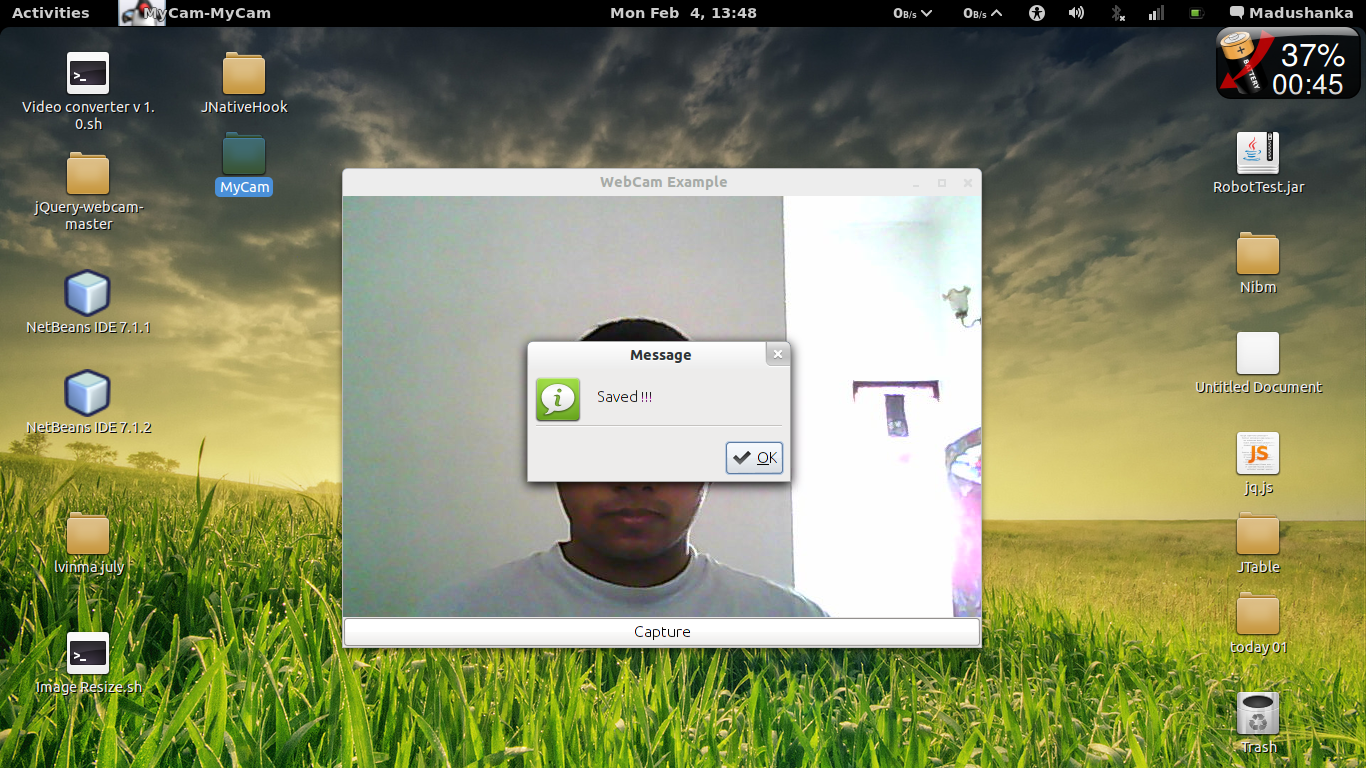
Simple Webcam App with capture button
Saving image
package MyCam;

import au.edu.jcu.v4l4j.*;
import au.edu.jcu.v4l4j.exceptions.StateException;
import au.edu.jcu.v4l4j.exceptions.V4L4JException;
import com.sun.java.swing.plaf.gtk.GTKLookAndFeel;
import java.awt.BorderLayout;
import java.awt.event.MouseAdapter;
import java.awt.event.MouseEvent;
import java.awt.event.WindowAdapter;
import java.awt.image.BufferedImage;
import java.io.File;
import java.io.IOException;
import java.util.logging.Level;
import java.util.logging.Logger;
import javax.imageio.ImageIO;
import javax.swing.*;

/**
*
*
* @author madushanka
*
*/
public class MyCam extends WindowAdapter implements CaptureCallback {

private static int width = 640, height = 480, std = V4L4JConstants.STANDARD_WEBCAM, channel = 0;
private static String device = "/dev/video0"; //getting device this is the path of device
private VideoDevice videoDevice;
private FrameGrabber frameGrabber;
private JLabel label;
private JFrame frame;
private JButton button;
BufferedImage bf;

public static void main(String args[]) throws UnsupportedLookAndFeelException {

UIManager.setLookAndFeel(new GTKLookAndFeel());
new MyCam();

}

public MyCam() {


try {
initFrameGrabber();     // creating frame grabber
} catch (V4L4JException e1) {
System.err.println("Error setting up capture");
e1.printStackTrace();


cleanupCapture();
return;
}


initGUI(); // creating Jframe


try {
frameGrabber.startCapture();   // Starting cam
} catch (V4L4JException e) {
System.err.println("Error starting the capture");
e.printStackTrace();
}
}

private void initFrameGrabber() throws V4L4JException {   // Setting Framegrabber
videoDevice = new VideoDevice(device); // getting the webcam
frameGrabber = videoDevice.getJPEGFrameGrabber(width, height, channel, std, 80);
frameGrabber.setCaptureCallback(this);
width = frameGrabber.getWidth();
height = frameGrabber.getHeight();

}

private void initGUI() {    // setting JFrame
frame = new JFrame();
label = new JLabel();
button = new JButton("Capture");
frame.getContentPane().add(label);
frame.getContentPane().add(button, BorderLayout.PAGE_END);
frame.setDefaultCloseOperation(JFrame.EXIT_ON_CLOSE);
frame.addWindowListener(this);
frame.setTitle("WebCam Example");
frame.setVisible(true);
frame.setSize(width, height);
button.addMouseListener(new MouseAdapter() {

public void mouseClicked(MouseEvent e) {

System.out.println(bf);
try {
ImageIO.write(bf, "png", new File("out.png"));    // saving image
JOptionPane.showMessageDialog(null, "Saved !!!");
} catch (IOException ex) {
Logger.getLogger(MyCam.class.getName()).log(Level.SEVERE, null, ex);
}


}
});
}

// this method is use for turn off cam and release framegrabber and device
private void cleanupCapture() {
try {
frameGrabber.stopCapture();
} catch (StateException ex) {
}


videoDevice.releaseFrameGrabber();
videoDevice.release();
}

@Override
public void exceptionReceived(V4L4JException e) {

e.printStackTrace();
}

// this method is call from startCapture() method
// getting the frame from framegrabber and draw it on JLable to show the user and recycle frame
// again getting frame , showing it , recycle it
@Override
public void nextFrame(VideoFrame frame) {
setImage(frame.getBufferedImage()); // get the captured frame to Buffered Image

label.getGraphics().drawImage(frame.getBufferedImage(), 0, 0, width, height, null);


frame.recycle();

}

public void setImage(BufferedImage b) {
bf = b;
}

public BufferedImage getImage() {
return bf;
}
}